Receiving on PDT
This document describes receiving in the handheld-terminal app the operator holds at the dock next to the truck. The PDT operator does not create the receipt and is not responsible for the phases that run on the workstation before and after their shift — their work is focused on recording the fact of receiving.
If you are looking for the full process, see Receiving in the client app.
Use the variation picker on the right (or the collapsed block above the text on a narrow screen) to tailor the steps to your warehouse settings.
What happens off the PDT
Steps performed before the PDT operator opens the receipt (typically on a workstation):
Step 1. Open the receipt
When the operator picks up the PDT, they do not create the receipt — it already exists in the system (the shift supervisor created it on the workstation, either from an inbound order or as a standalone document).
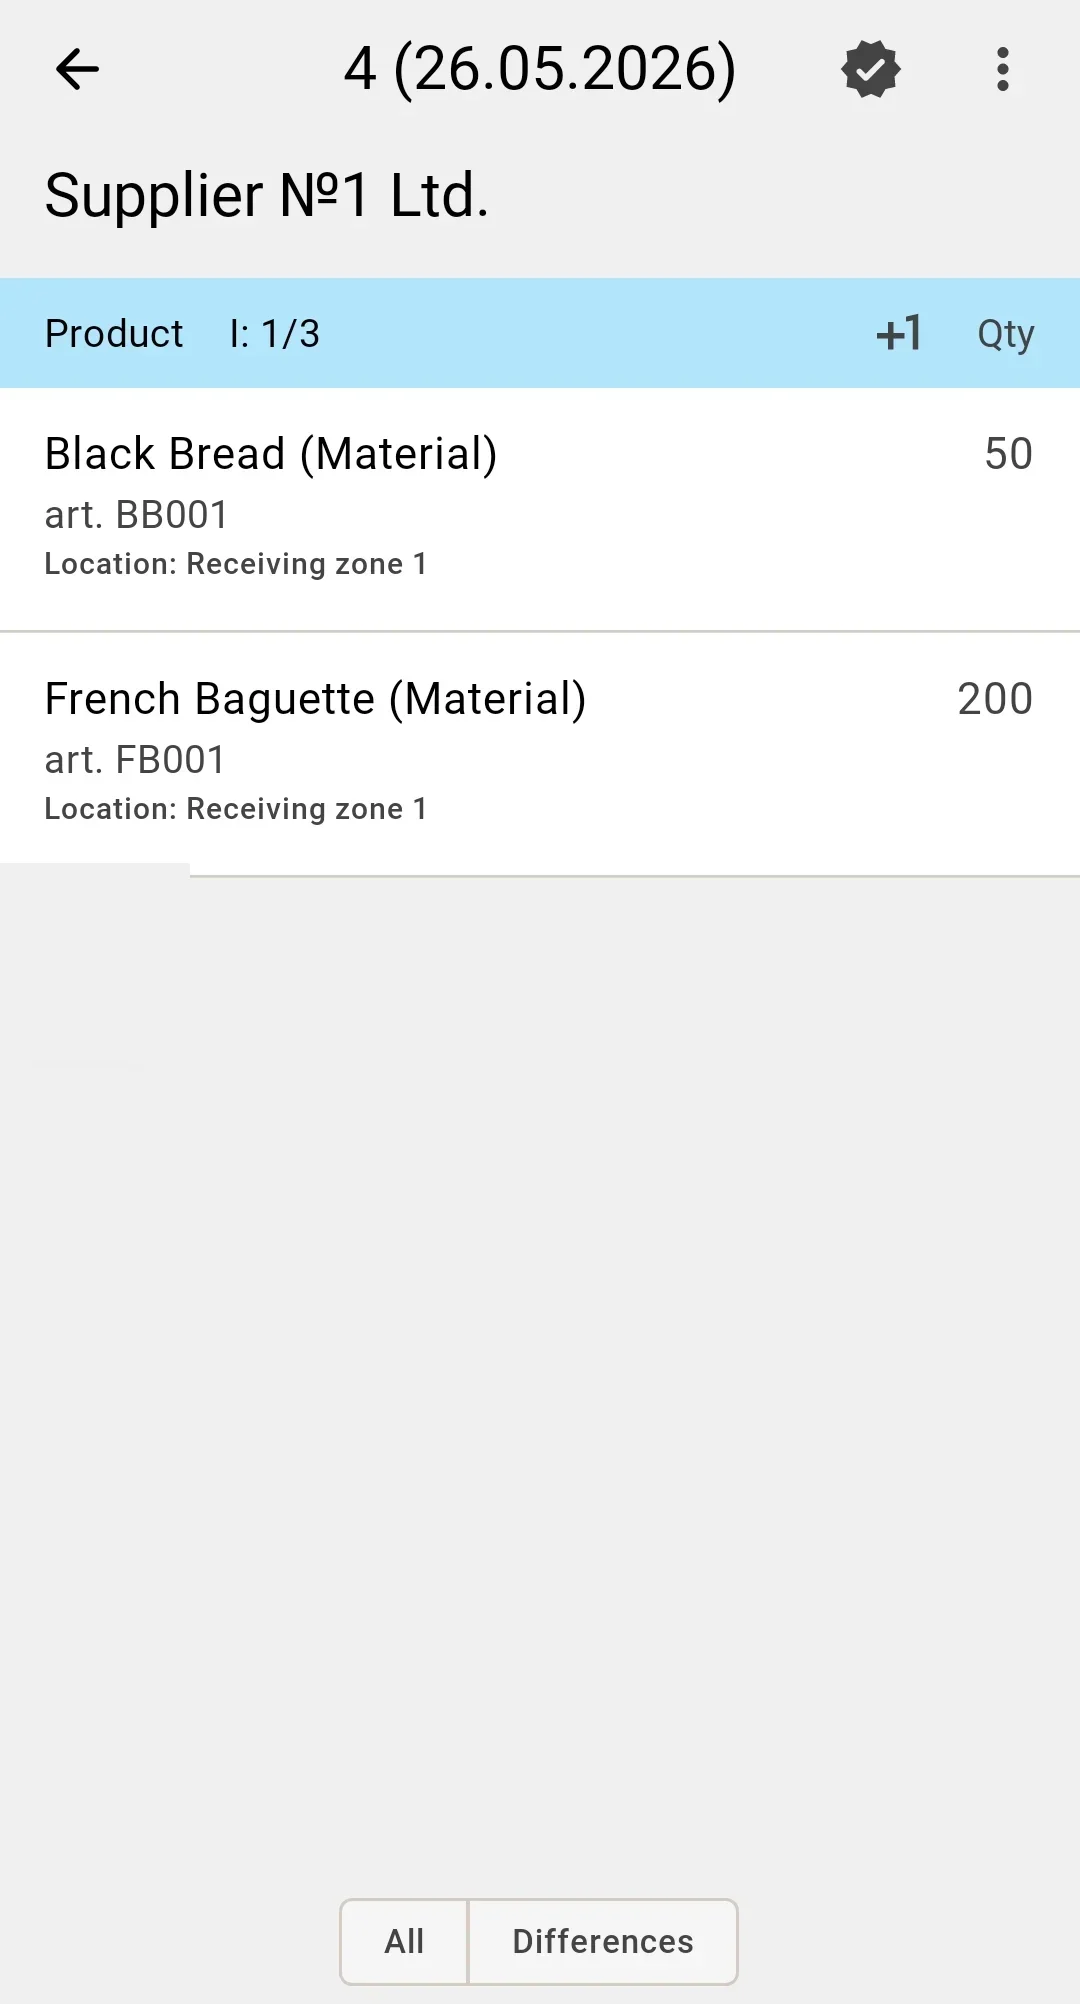
The PDT home screen shows the list of receipts available to the operator's shift. Only documents in To receive reach that list; a receipt still in Draft is moved on by the shift supervisor in the client app. Each row shows the sender, the external number, the document number, the date, who the work is assigned to, and progress as received lines out of the total. The operator taps a row and the receipt opens as a list of lines to receive.
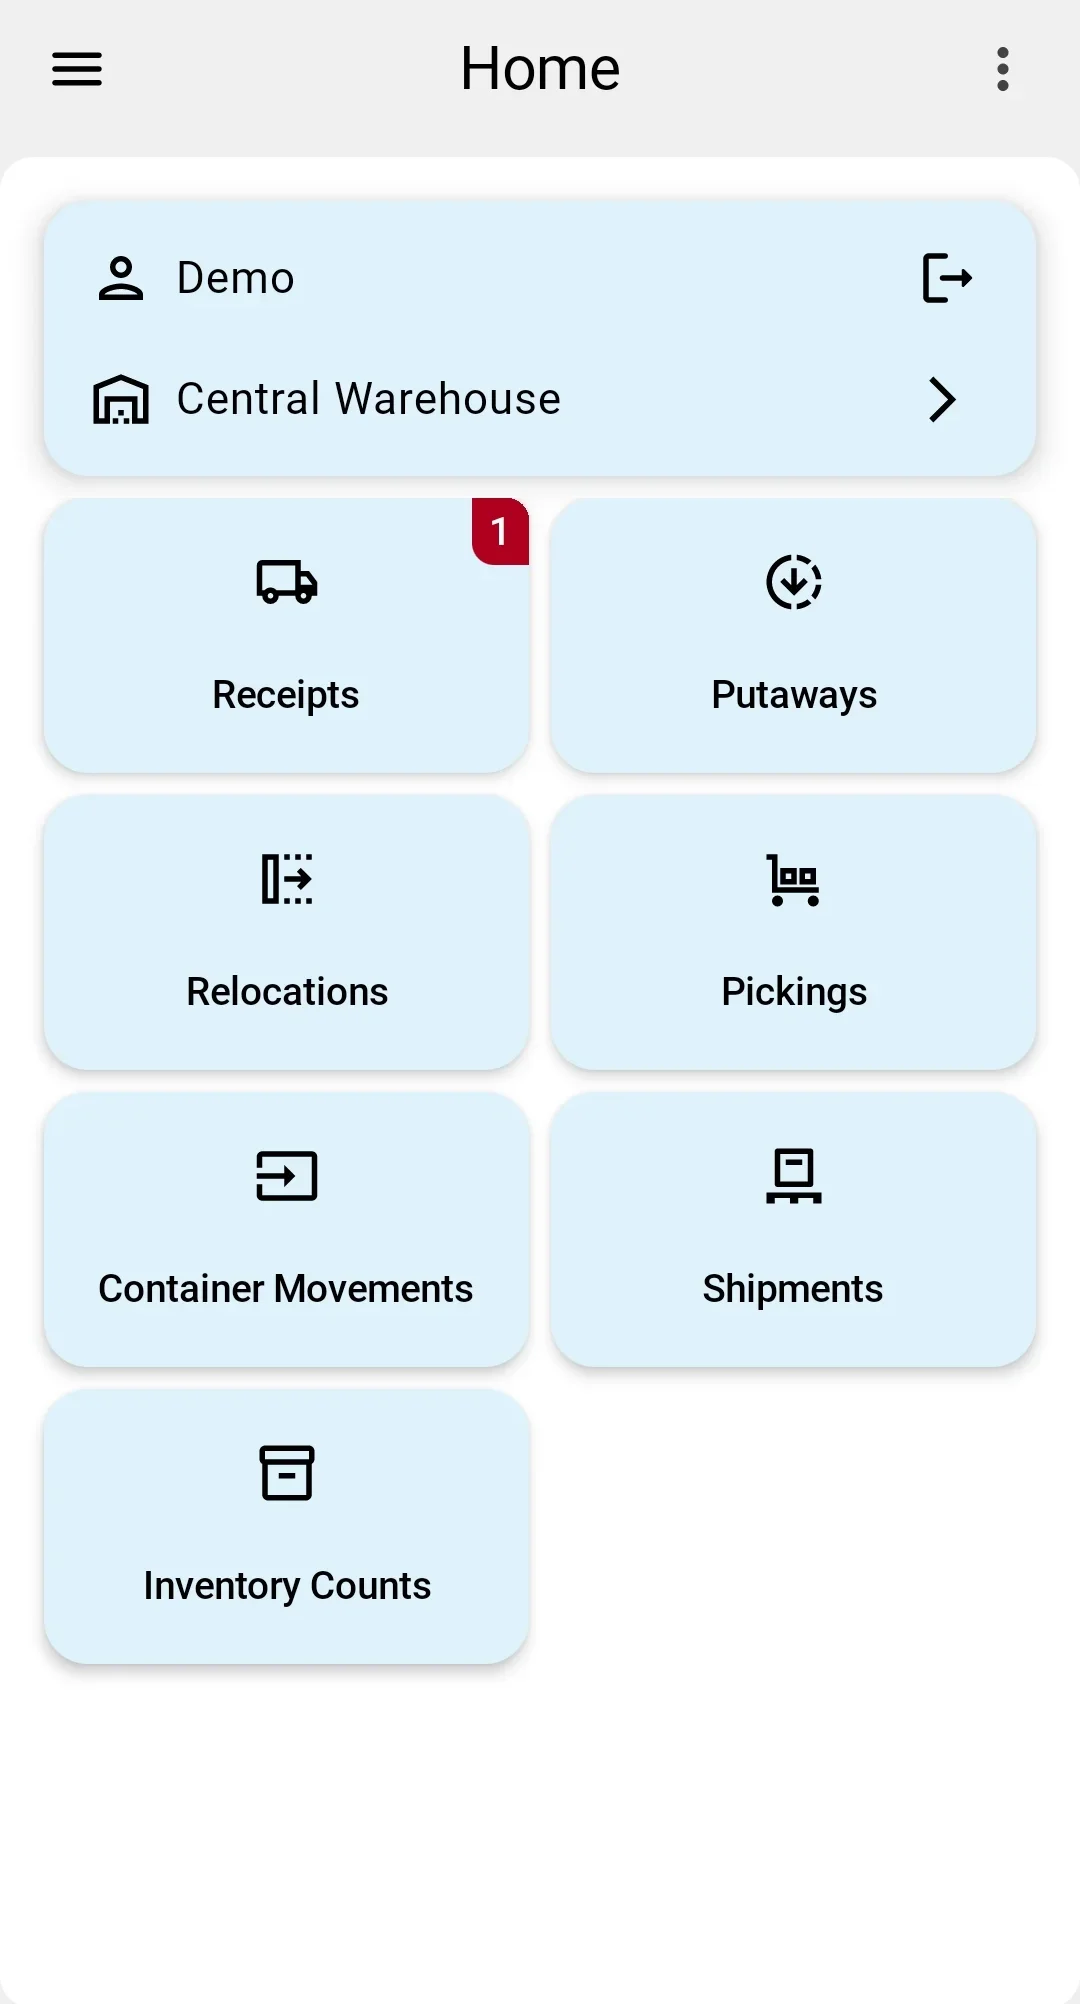
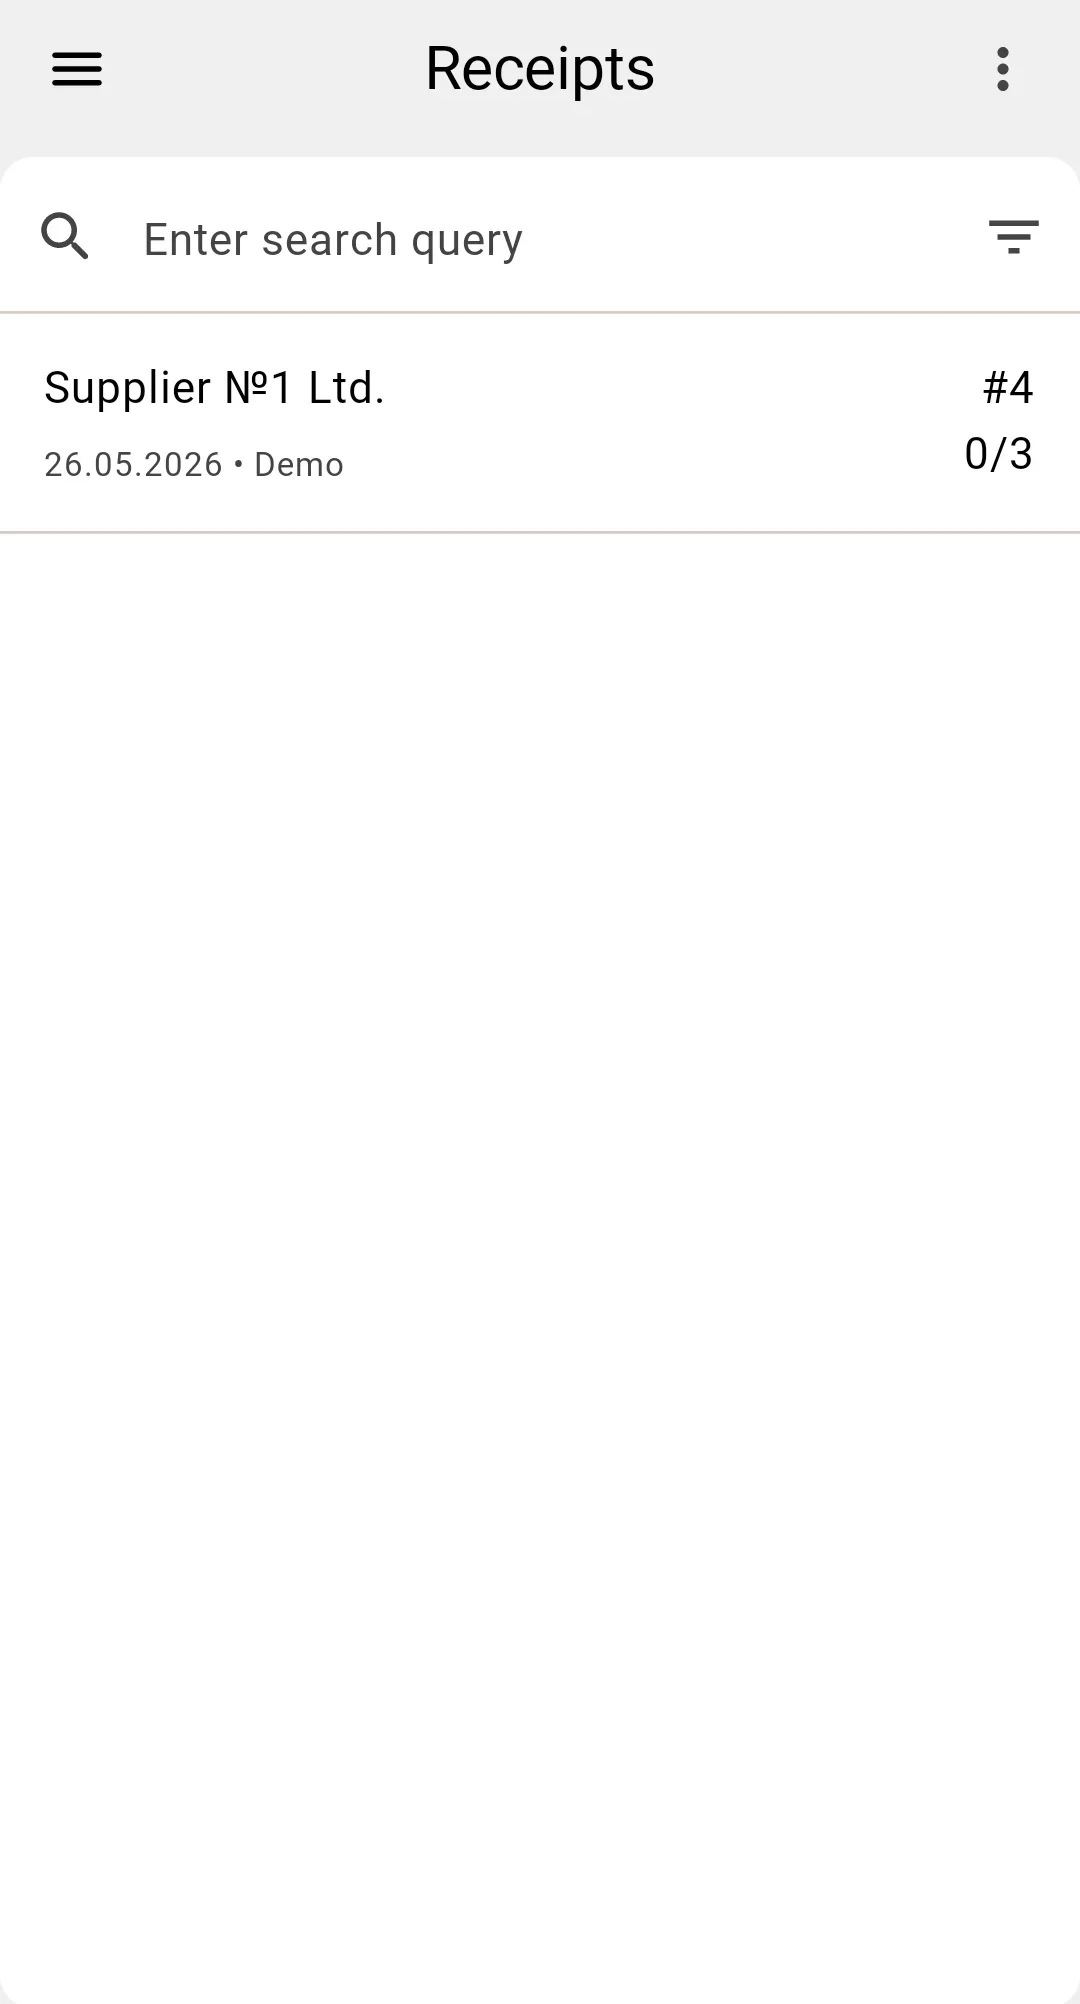
If the receipt the operator is looking for is not in the list, they contact the shift supervisor — creating a receipt on the PDT is not supported.
Step 2. Pick the receiving target
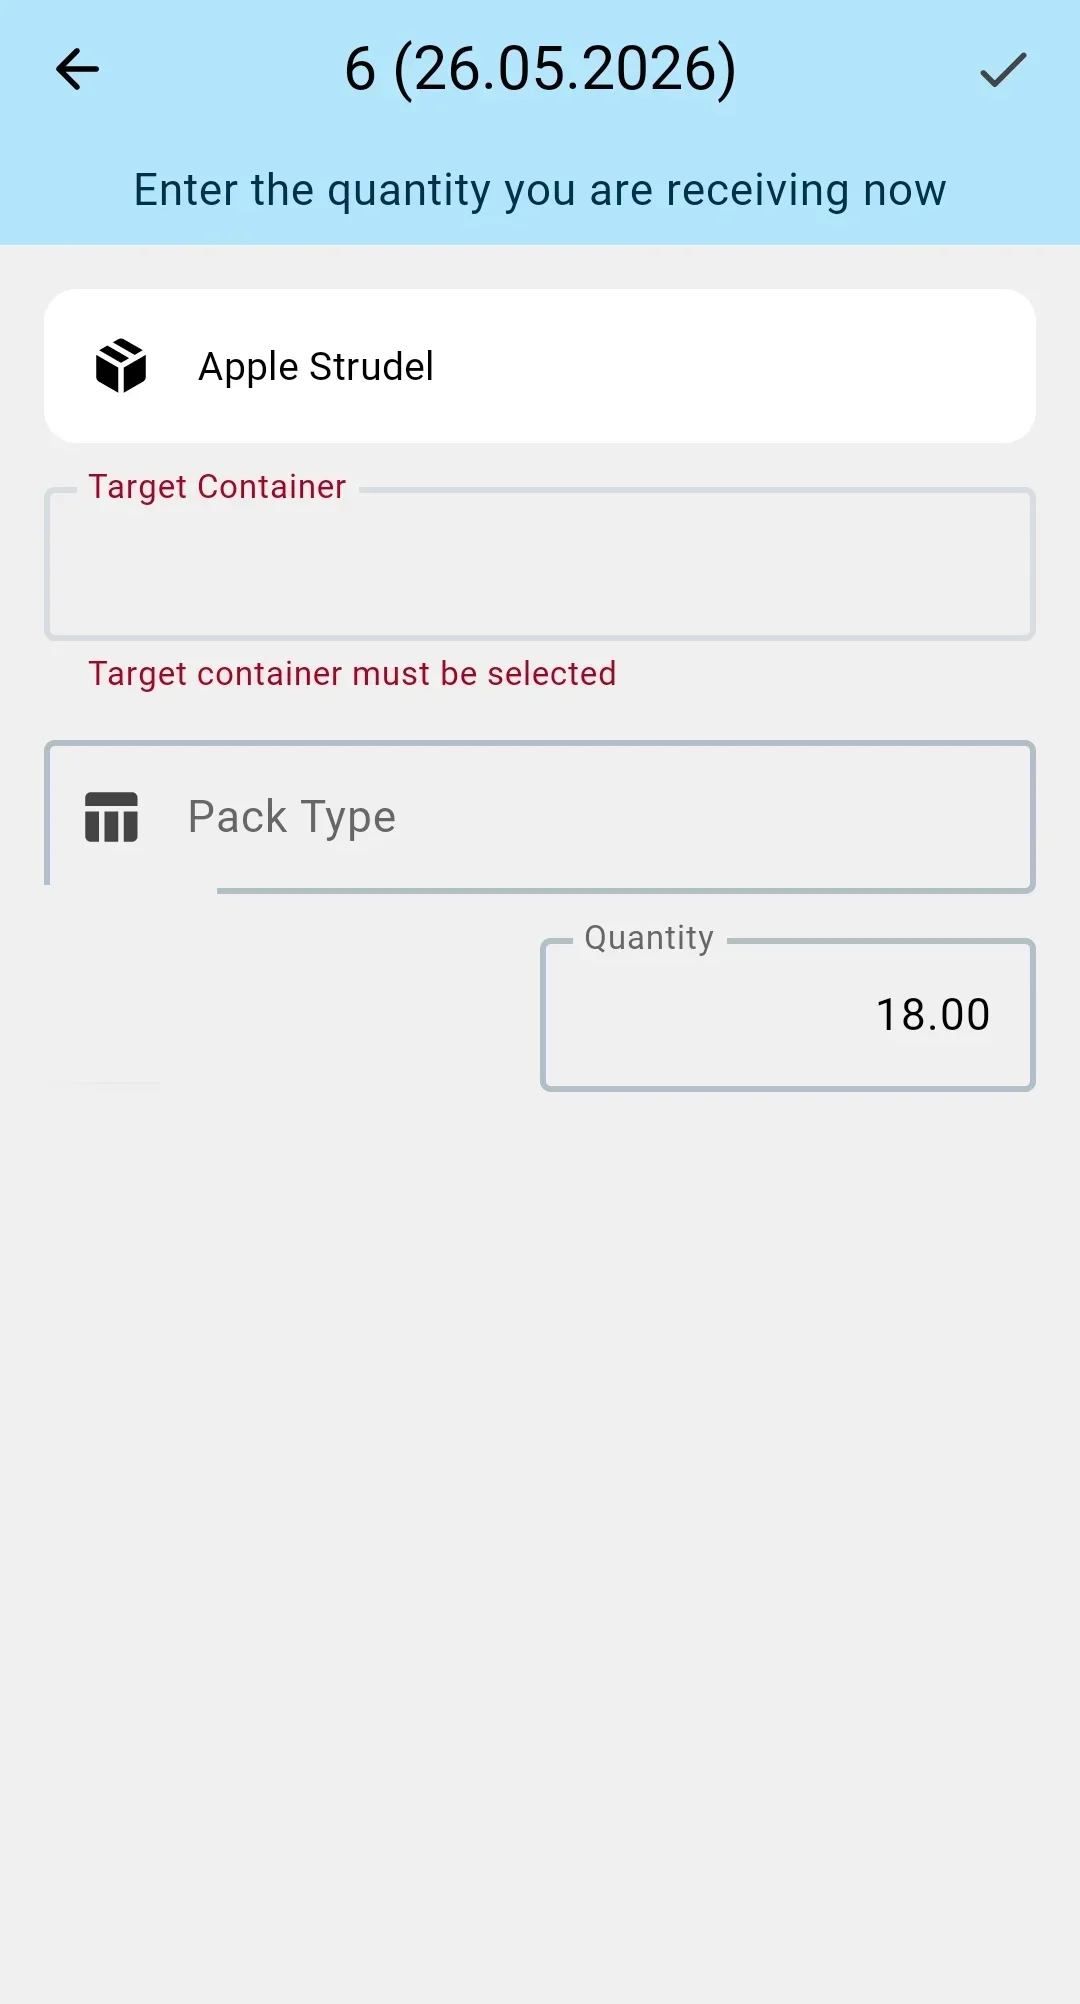
Before scanning lines, the operator has to tell the system where they land: directly into a cell of the receiving zone, into a supplier container, into a warehouse container, or into a temporary container. Without this step the next scans cannot be recorded — the system would not know which physical carrier to attach the goods to. Whether the step is mandatory depends on the warehouse settings.
Receiving container requirement
Receive into sender container if present
In this mode the operator can receive into a supplier pallet when one is on the truck, or directly into a cell when there is no pallet. When the pallet is there, the operator scans its barcode and it becomes the target of the next line scans. When there is no pallet or it is not allowed by the sender-container-handling setting, the system skips this step and every line lands in a designated cell of the receiving zone. Choosing a warehouse or temporary container manually is not allowed in this mode.
Container required for receiving
In this mode line scans are not recorded without a target: the operator must specify the container goods are being received into. The options on the PDT are:
- scan the barcode of an existing supplier pallet (when the sender-container-handling setting allows it);
- scan the barcode of an empty warehouse pallet prepared in advance for this delivery;
- create a temporary container on the PDT by sticking a fresh barcode on it.
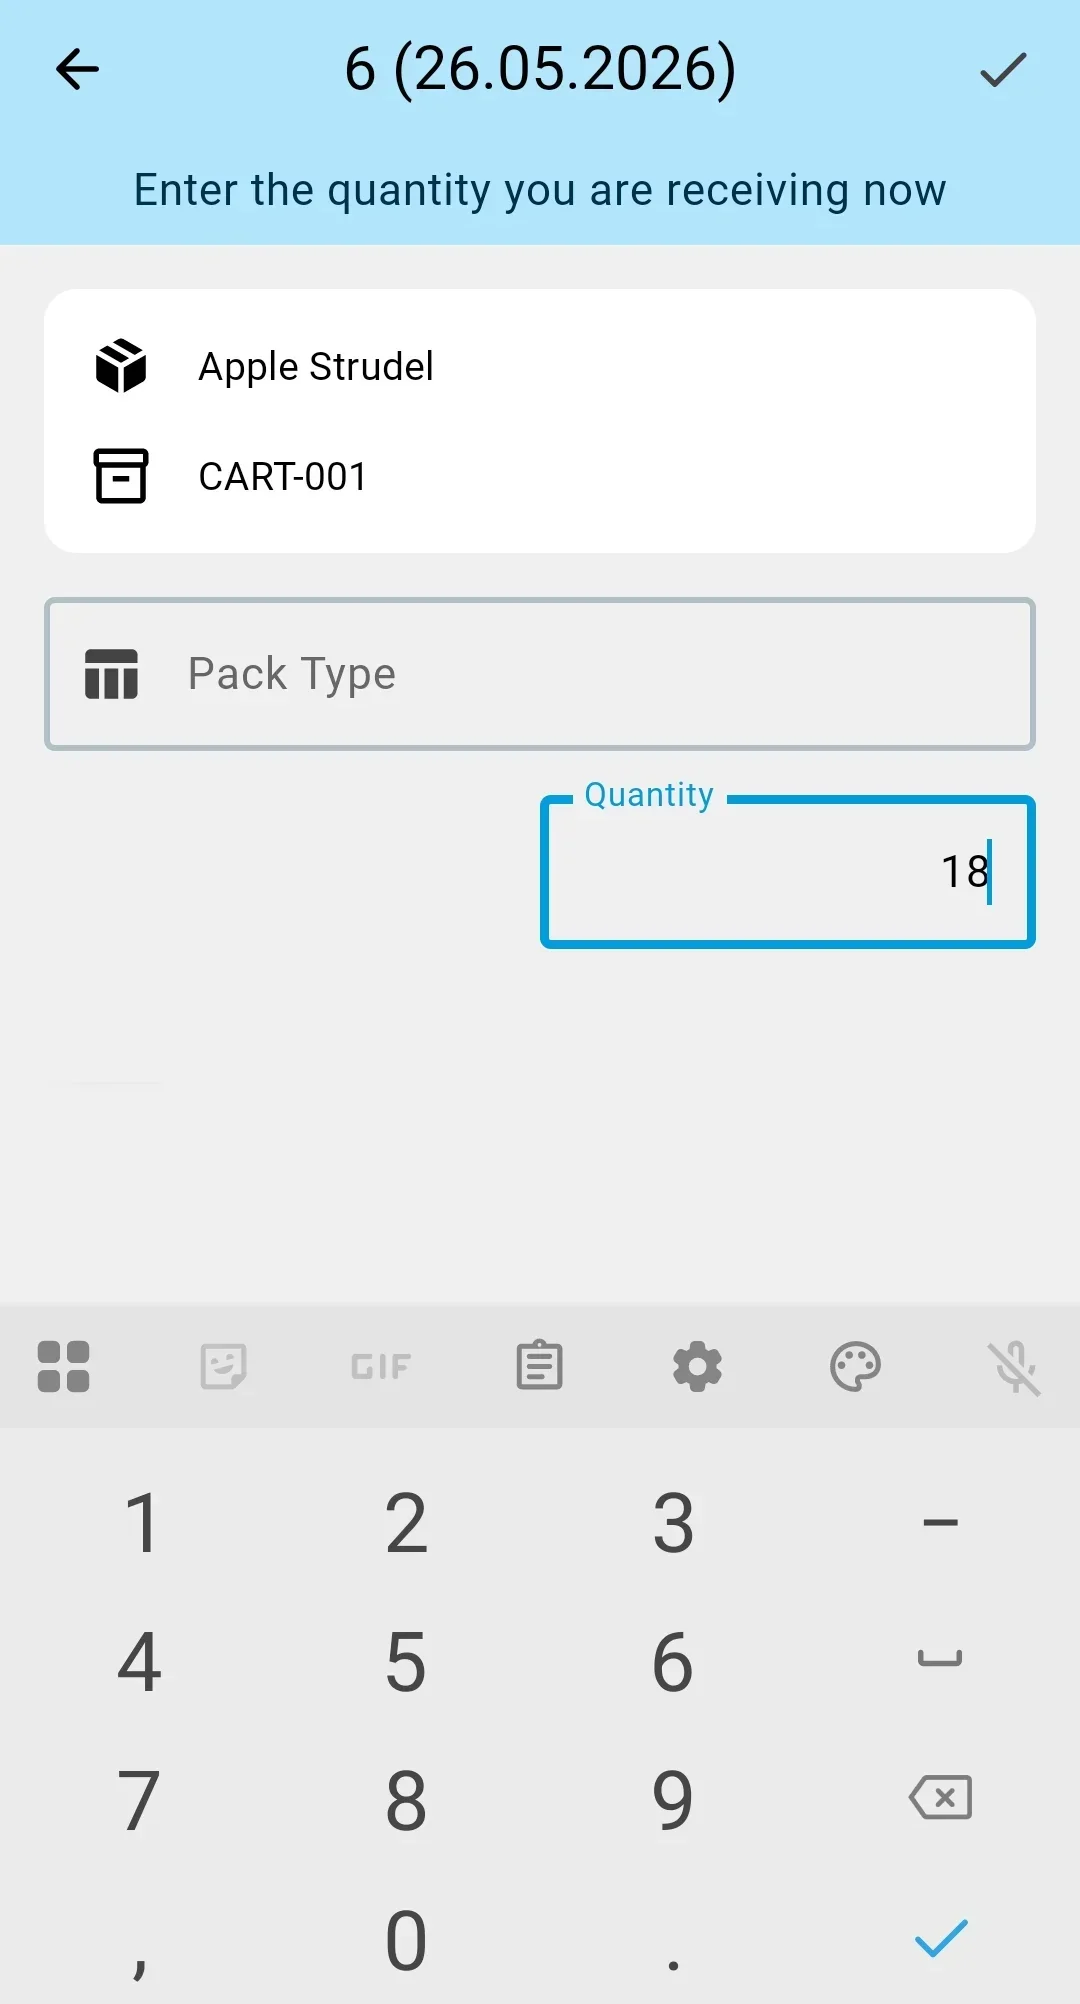
Once a target is picked, its number is shown at the top of the screen — so the operator can see which container the current batch of lines is being written into.
Sender container handling
Sender containers accepted for storage
When the supplier pallet is picked as the receiving target and the setting says "accept for storage", the pallet is registered on the warehouse balance as a storage unit straight after the scan. Every line scanned afterwards attaches to it as a storage container.
Sender containers accepted for putaway
When the supplier pallet is picked as the target and the setting says "accept for putaway", the pallet is registered on the balance and immediately flagged "to putaway". The lines inside it will move into the storage zone together with the pallet.
Sender containers for tracking only
When supplier containers are used only for lookup, scanning a pallet as the receiving target is not allowed. The operator does this scan only as a reference; the pallet itself does not become a storage container — the lines that were in it land either in a cell of the receiving zone or in a warehouse container, depending on the receiving container requirement.
Sender containers not used
When the supplier does not use containers, this step does not offer to scan a supplier pallet — only a warehouse or temporary container, when the receiving requirement calls for one.
Step 3. Record the fact
This is the core loop of the operator's work on the PDT. For each line in the document the operator identifies the SKU, sets the quantity, and saves the fact. The loop repeats until no unreceived lines remain.
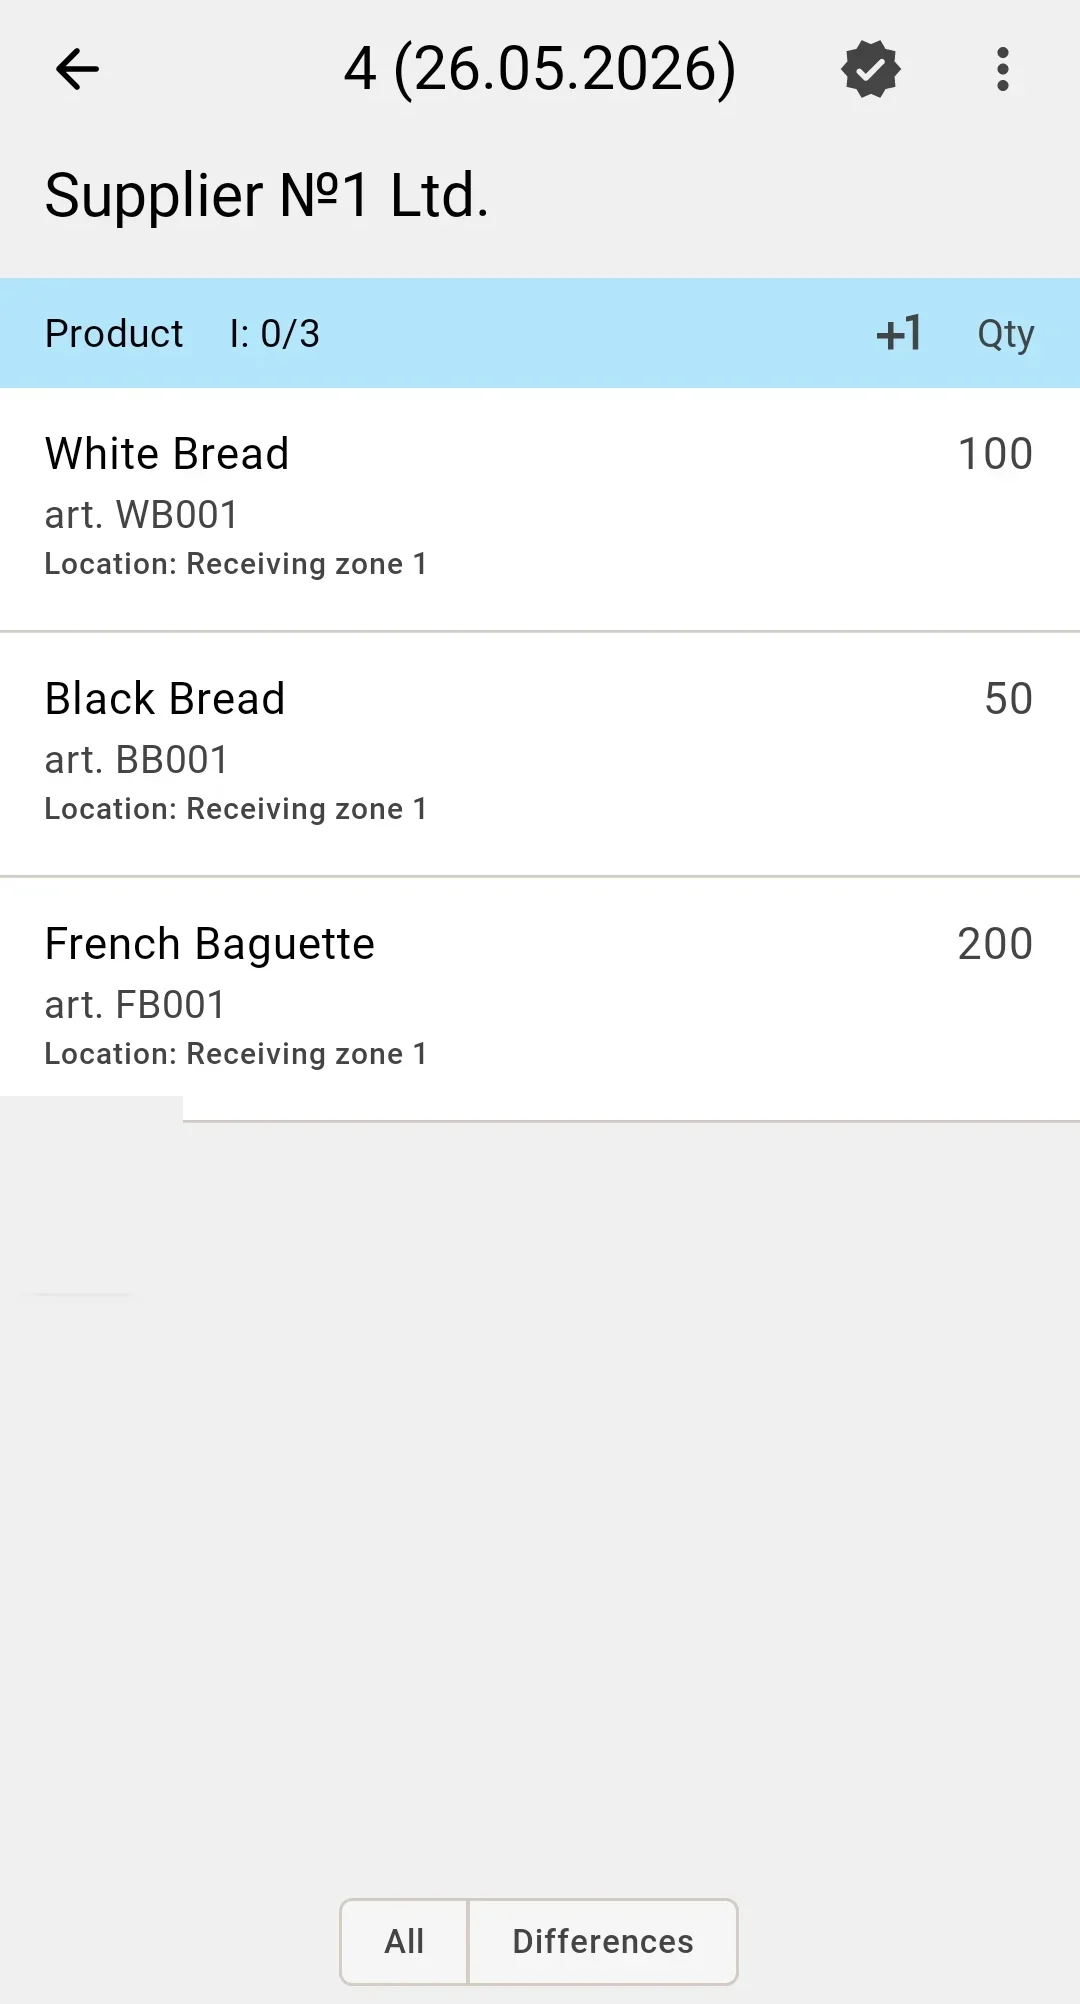
The operator identifies an SKU — the combination of product, product features (if tracked), lot (if tracked), and pack type — by scanning a barcode or by picking it manually from a list. Required attributes depend on the product configuration. How SKU selection works.
When the barcode is not found in the system, matches several variations, or the scanned line is not in the receipt, the operator sees a dialog. What to do in each case is described on the Barcode resolution page.
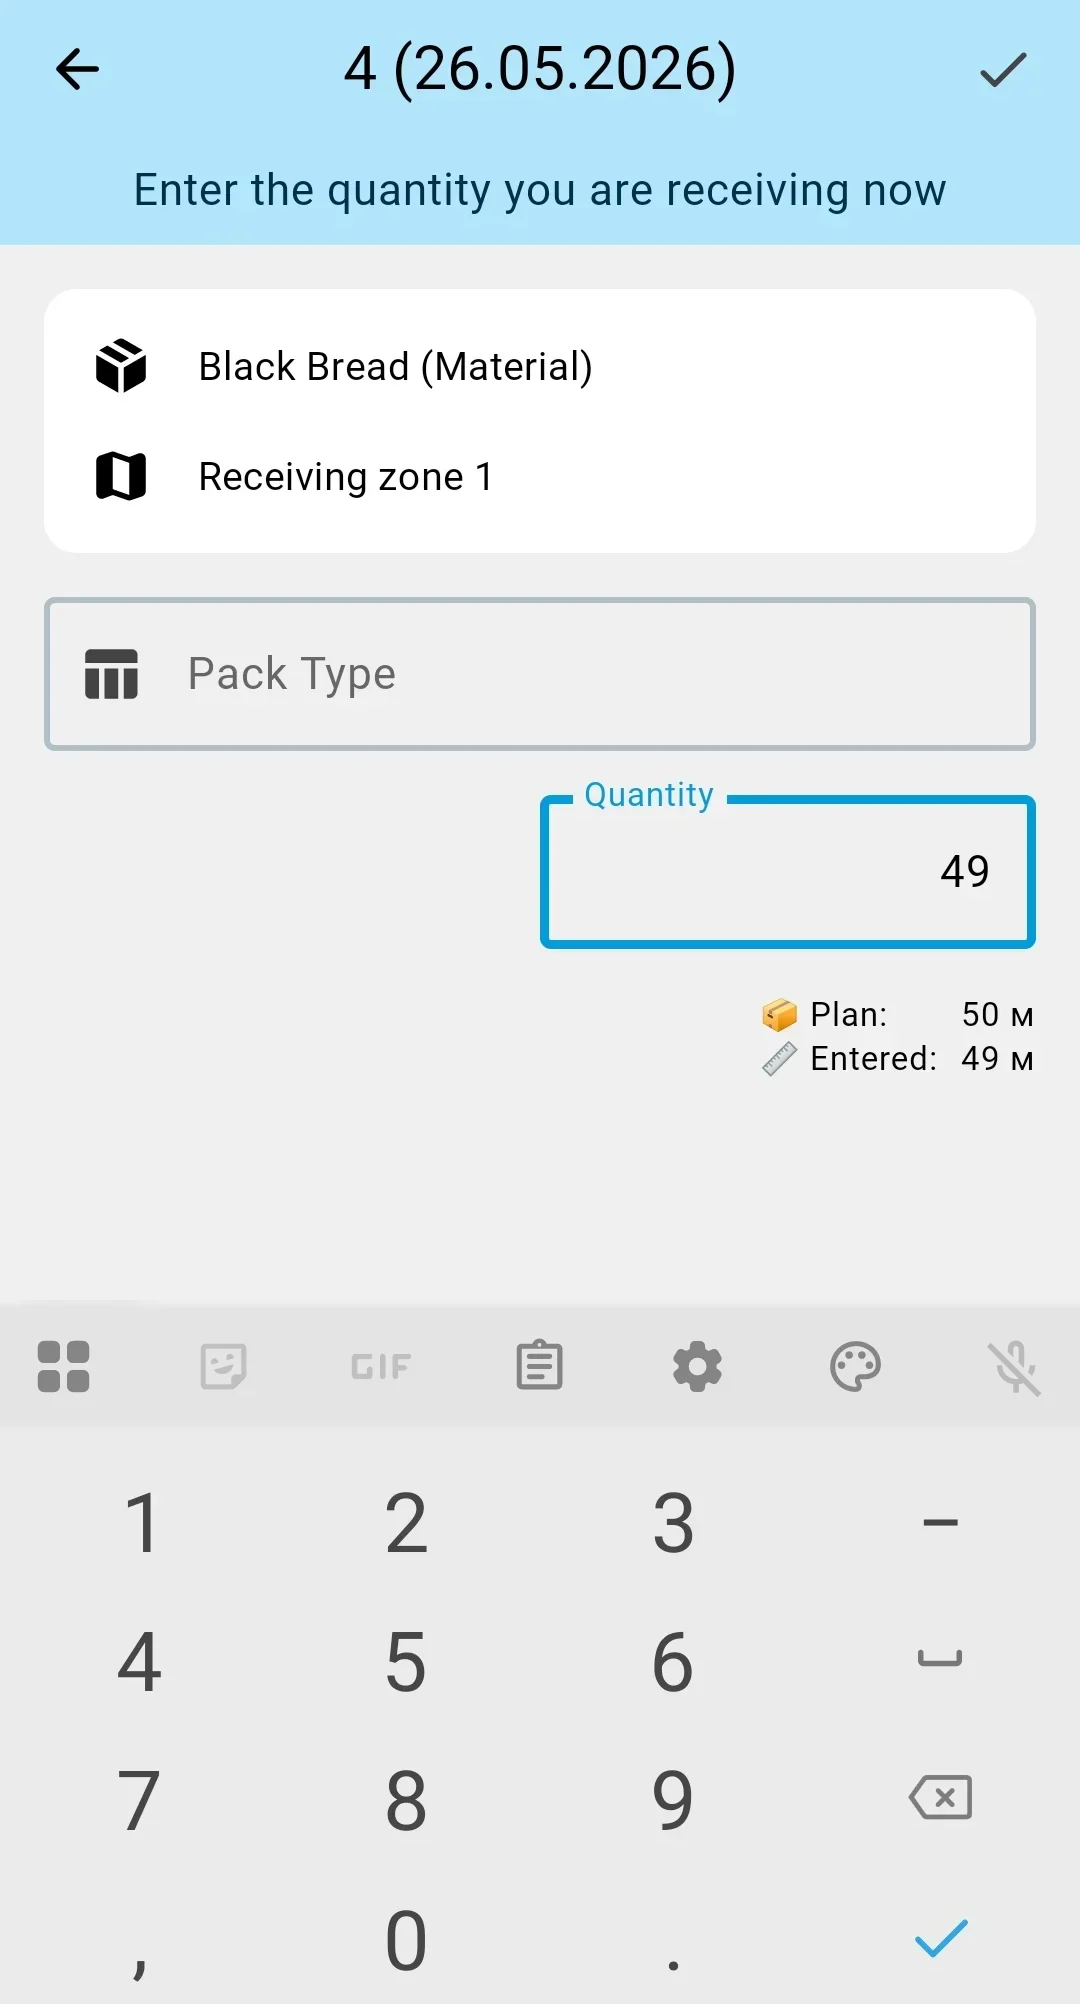
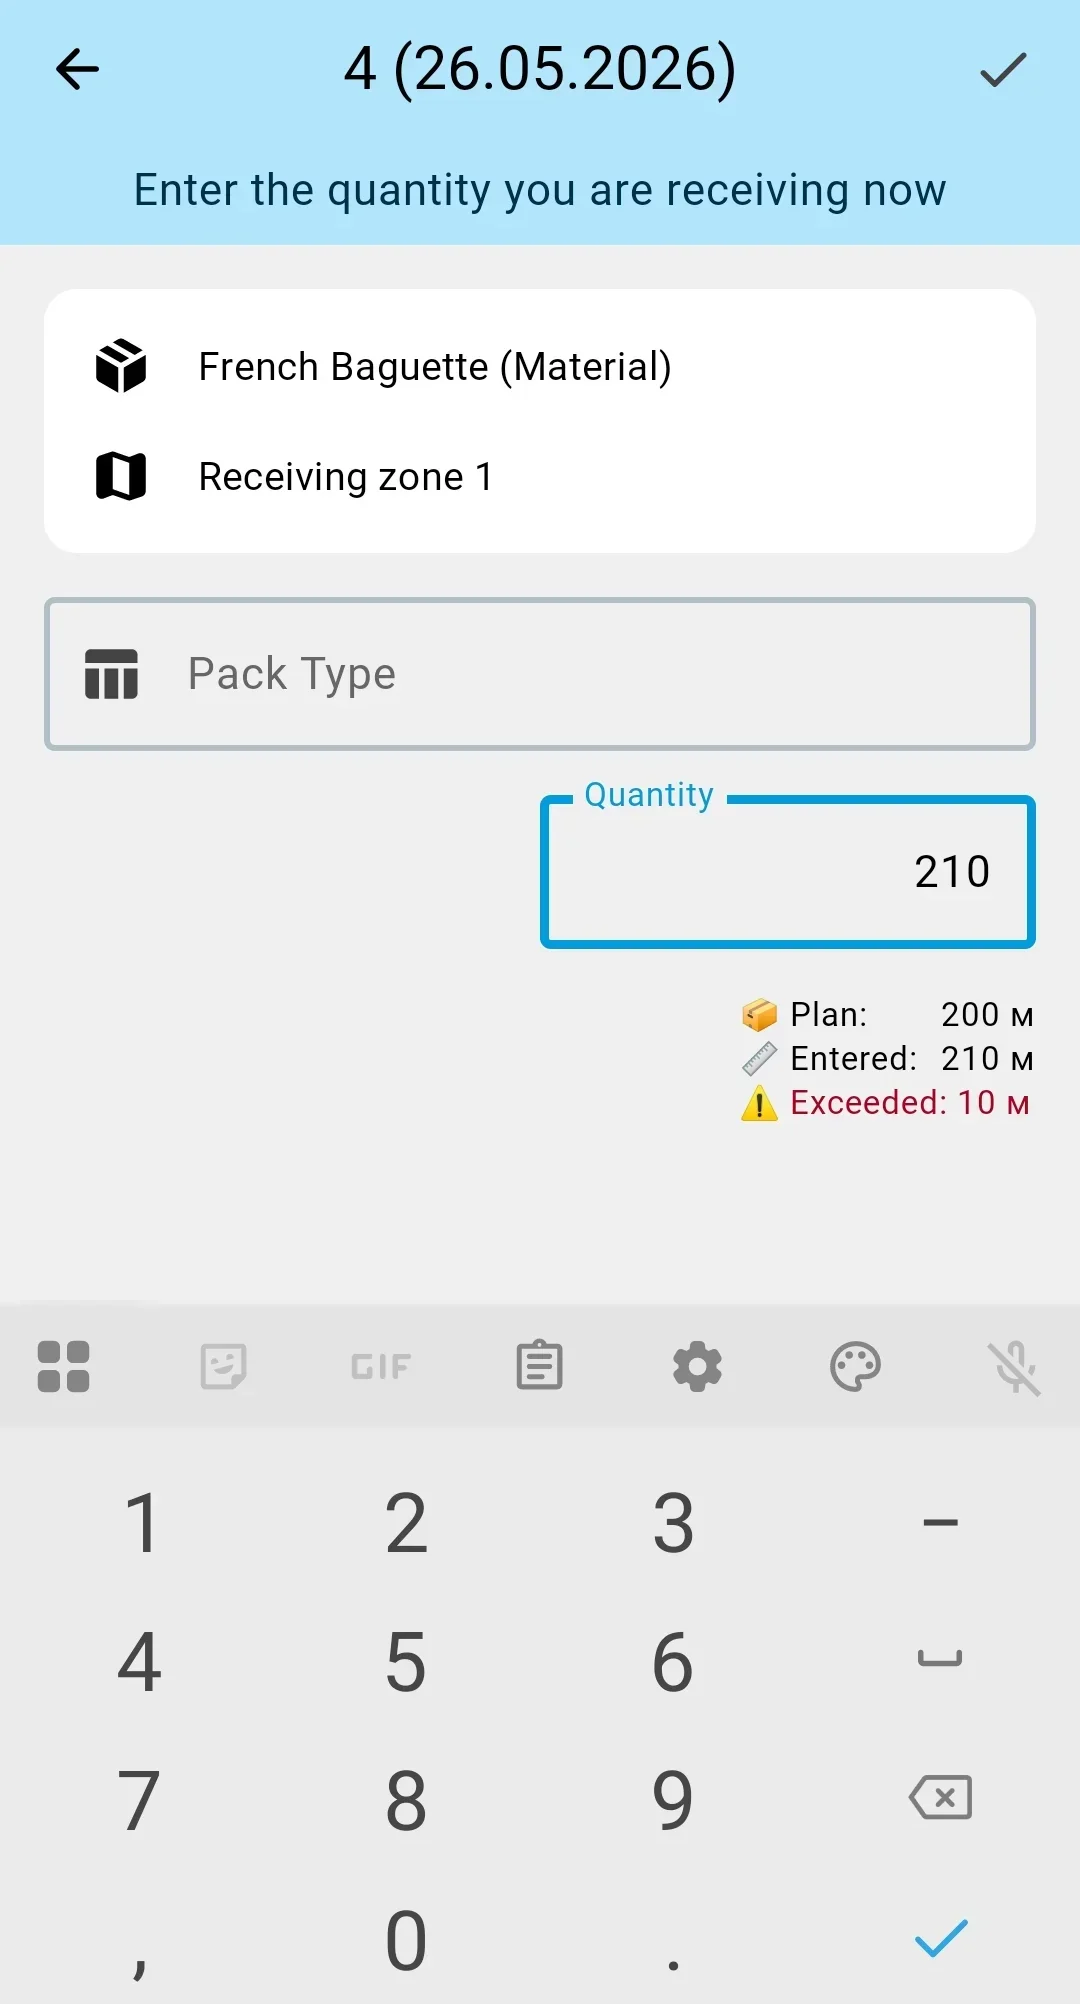
Quantities go in the quantity field — set from the barcode, typed by hand, or worked out in the calculator, with − and + to adjust; the pack type sits beside it. How the quantity field works.
Quantity entry mode
Quantity confirmed in form
In the confirm-on-save mode every barcode scan opens the fact form, showing the identified SKU (product, features, lot, pack type) and the quantity field. The operator sets the quantity and confirms.
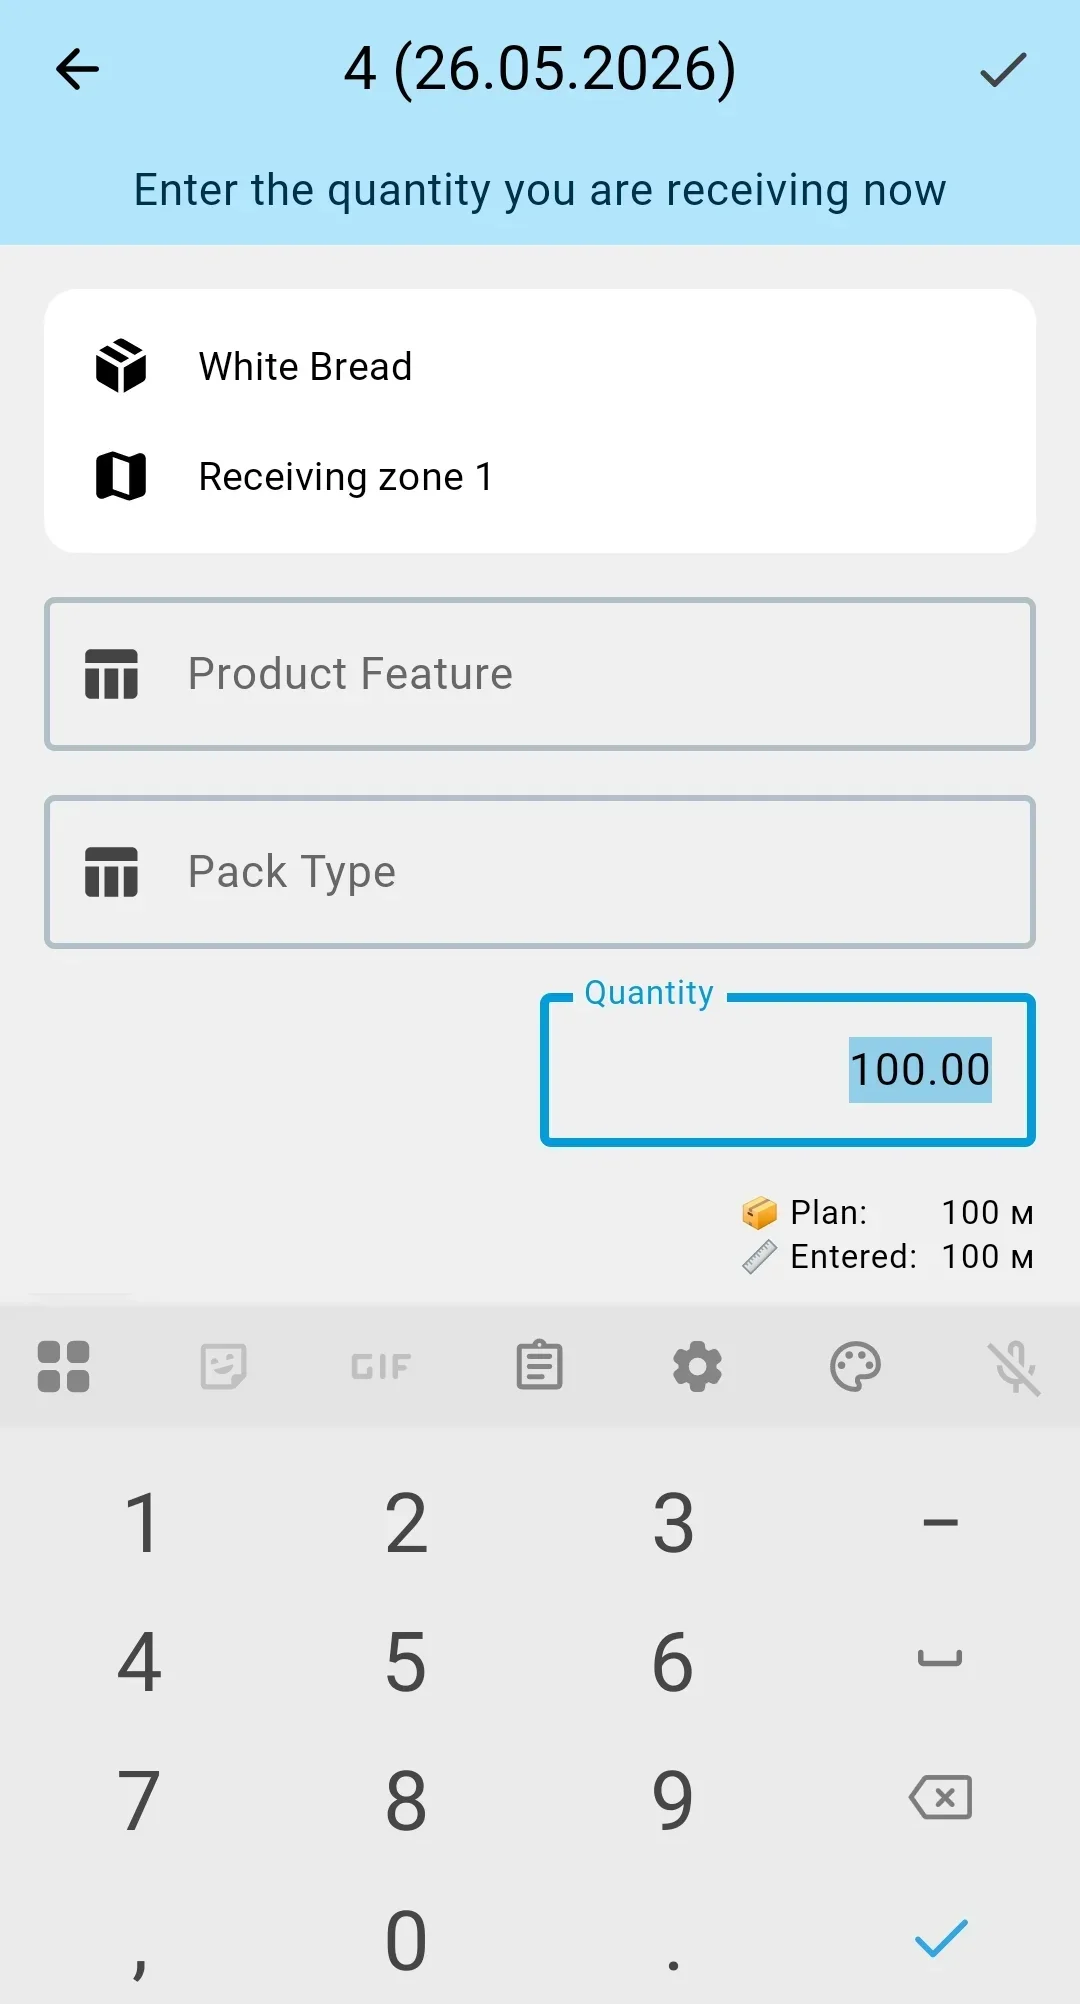
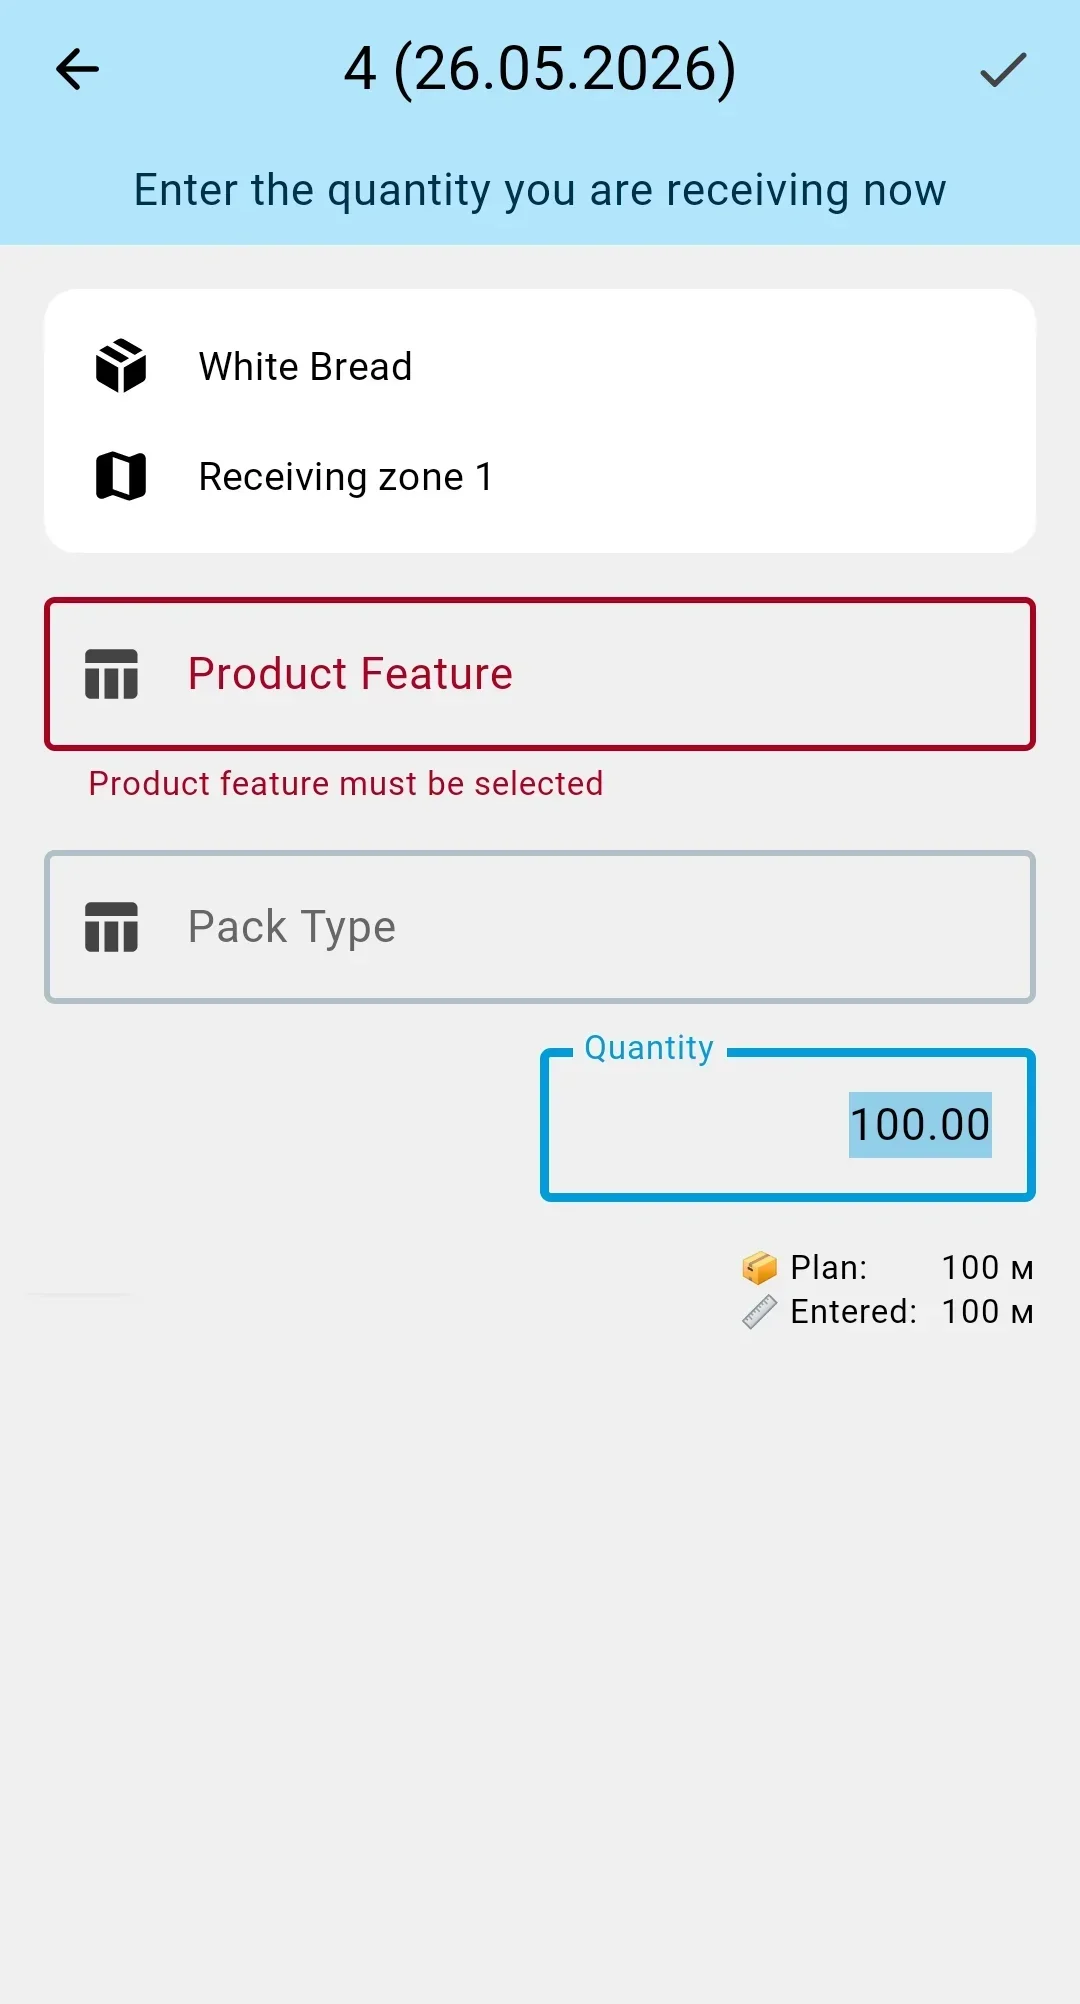
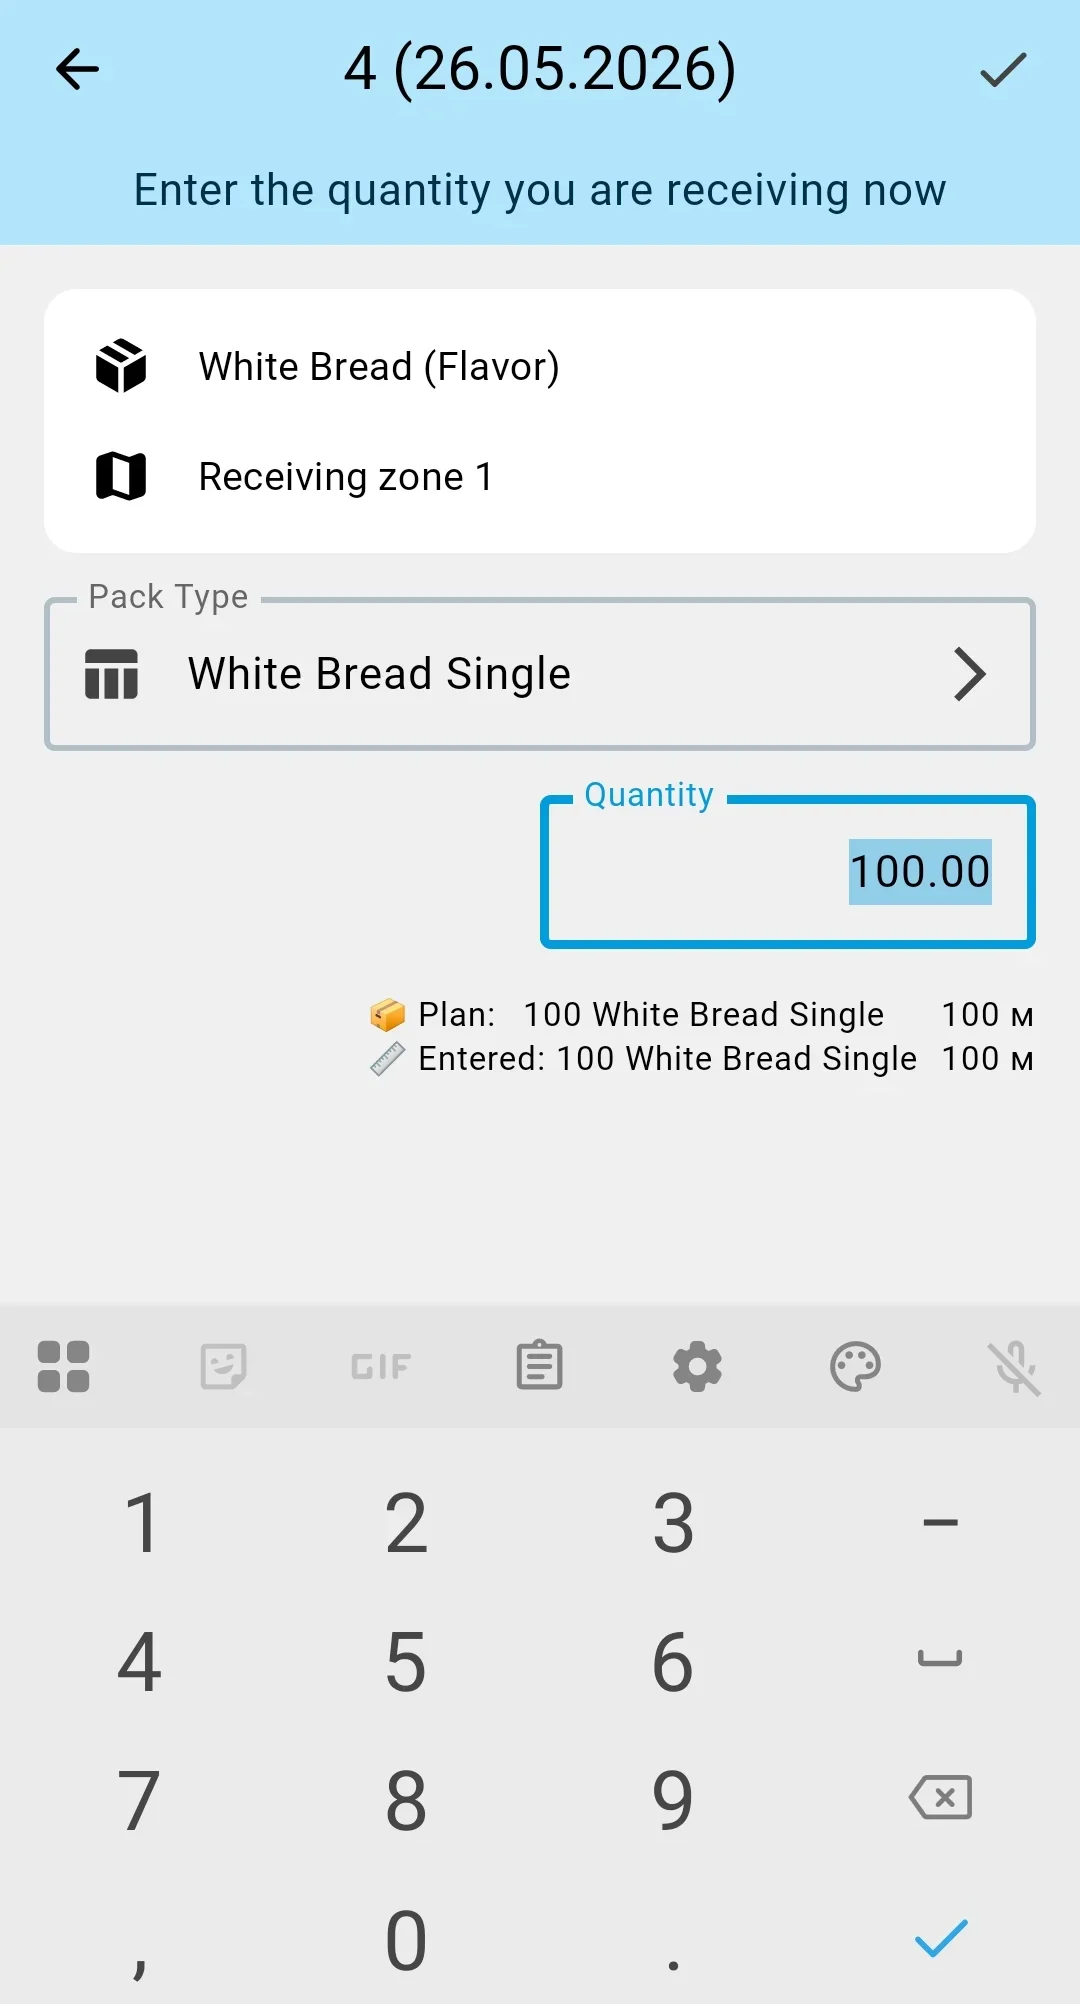
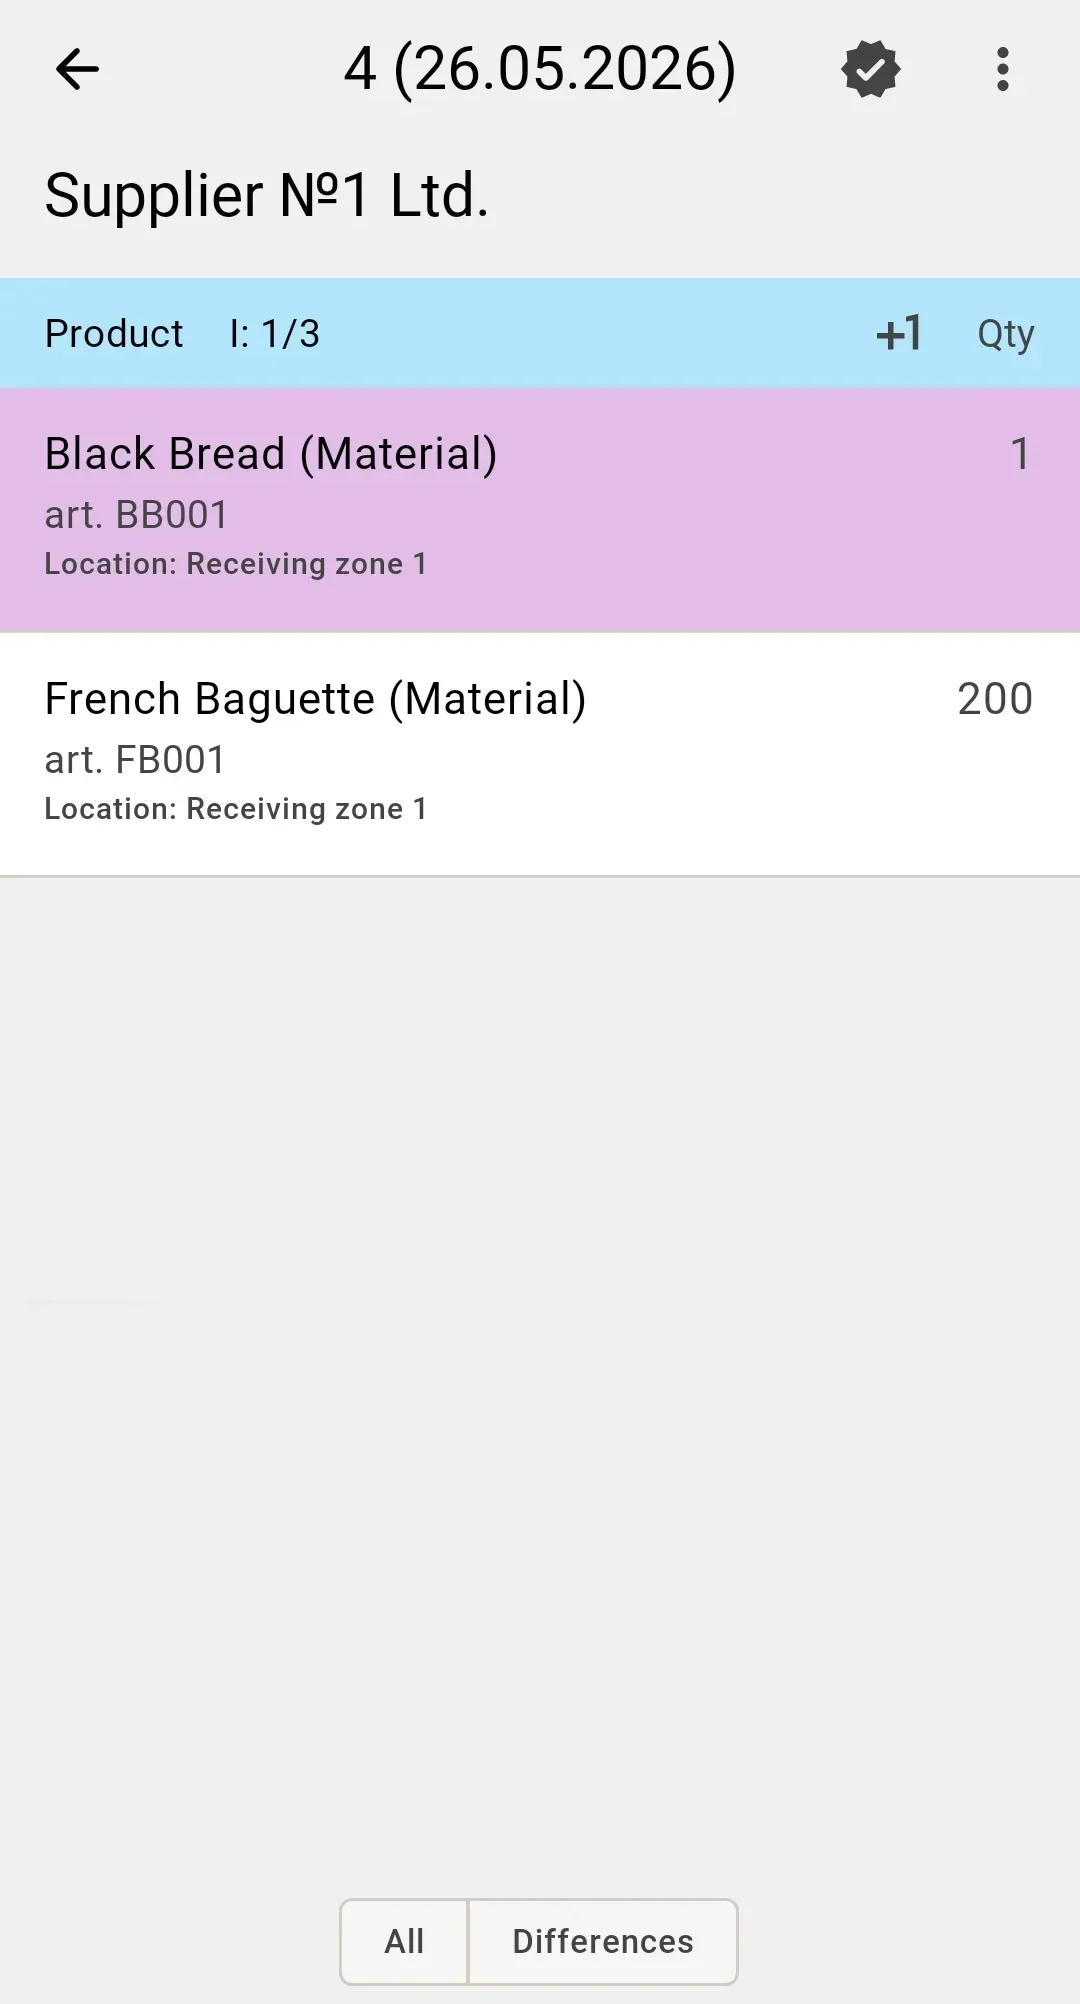
After confirmation the fact is saved, the form closes, and the screen returns to the line list. Line progress updates: the row shows how much of the expected quantity has already been received.
"+1": quick save on scan
In the +1 mode the form does not open — scanning saves the fact immediately. The saved quantity is:
- taken from the barcode when it carries a value;
- otherwise equal to one.
After a successful save a short animation showing the quantity just added pops up on the screen (for example "+1" or "+12.5"). When the server does not accept the fact (for example, because it would exceed the allowed quantity), the same animation slot shows an error mark, and the operator has to switch to the confirm-on-save mode to sort it out.
The mode speeds the work up noticeably when the operator is scanning identical lines one after another — for example, a long run of identical packs from a pallet.
After every saved fact the line list updates in real time: the per-line progress bar moves, overages are highlighted in a different colour, unreceived lines stay visible in the list. The Confirm the completion button becomes available once the operator has recorded at least one line.
Step 4. Close the receipt
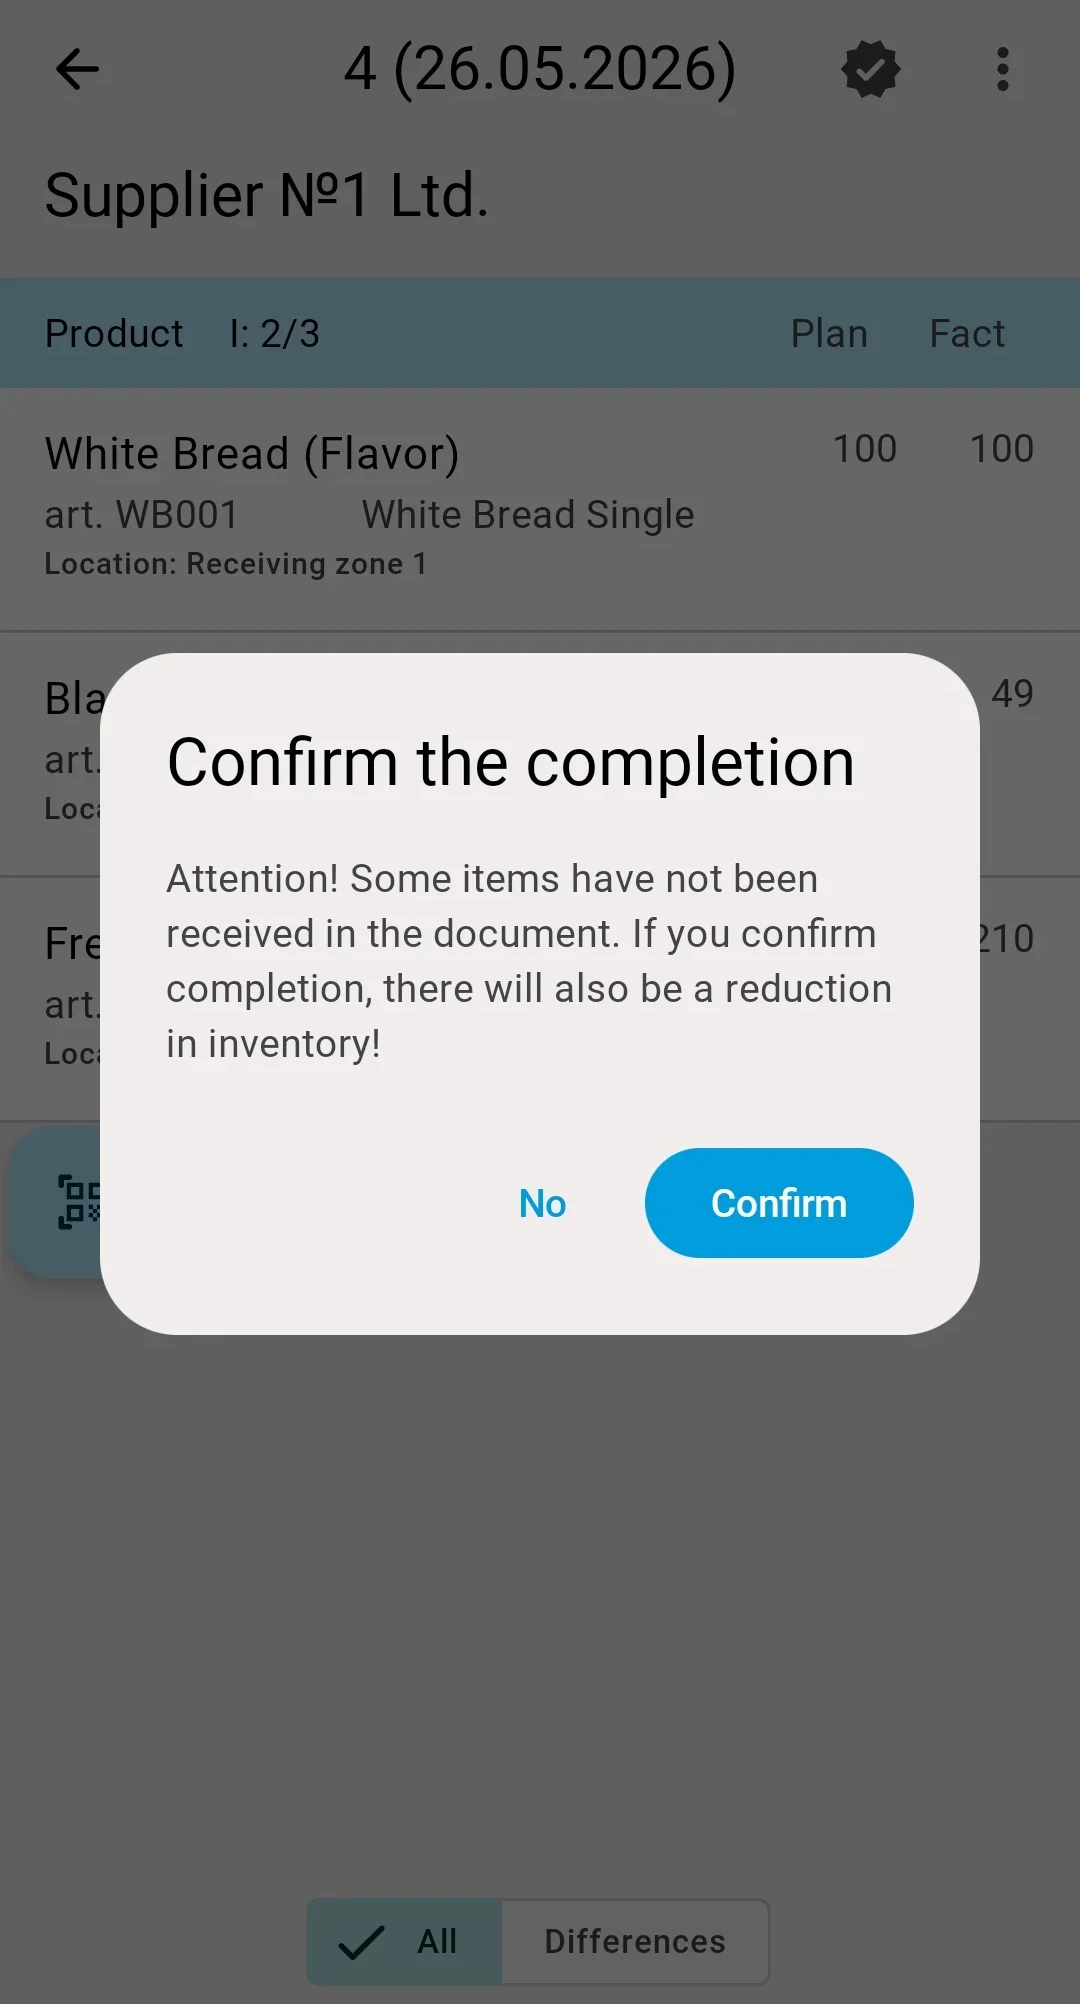
When every line has been processed — or the operator finishes work on the document early — they tap Confirm the completion, and the document moves to Received. At least one fact has to be recorded first: confirming an empty receipt is blocked with a prompt to receive at least one product. If a receiving container is still open, the confirmation button opens that container for closing first, and only then can the document be completed.
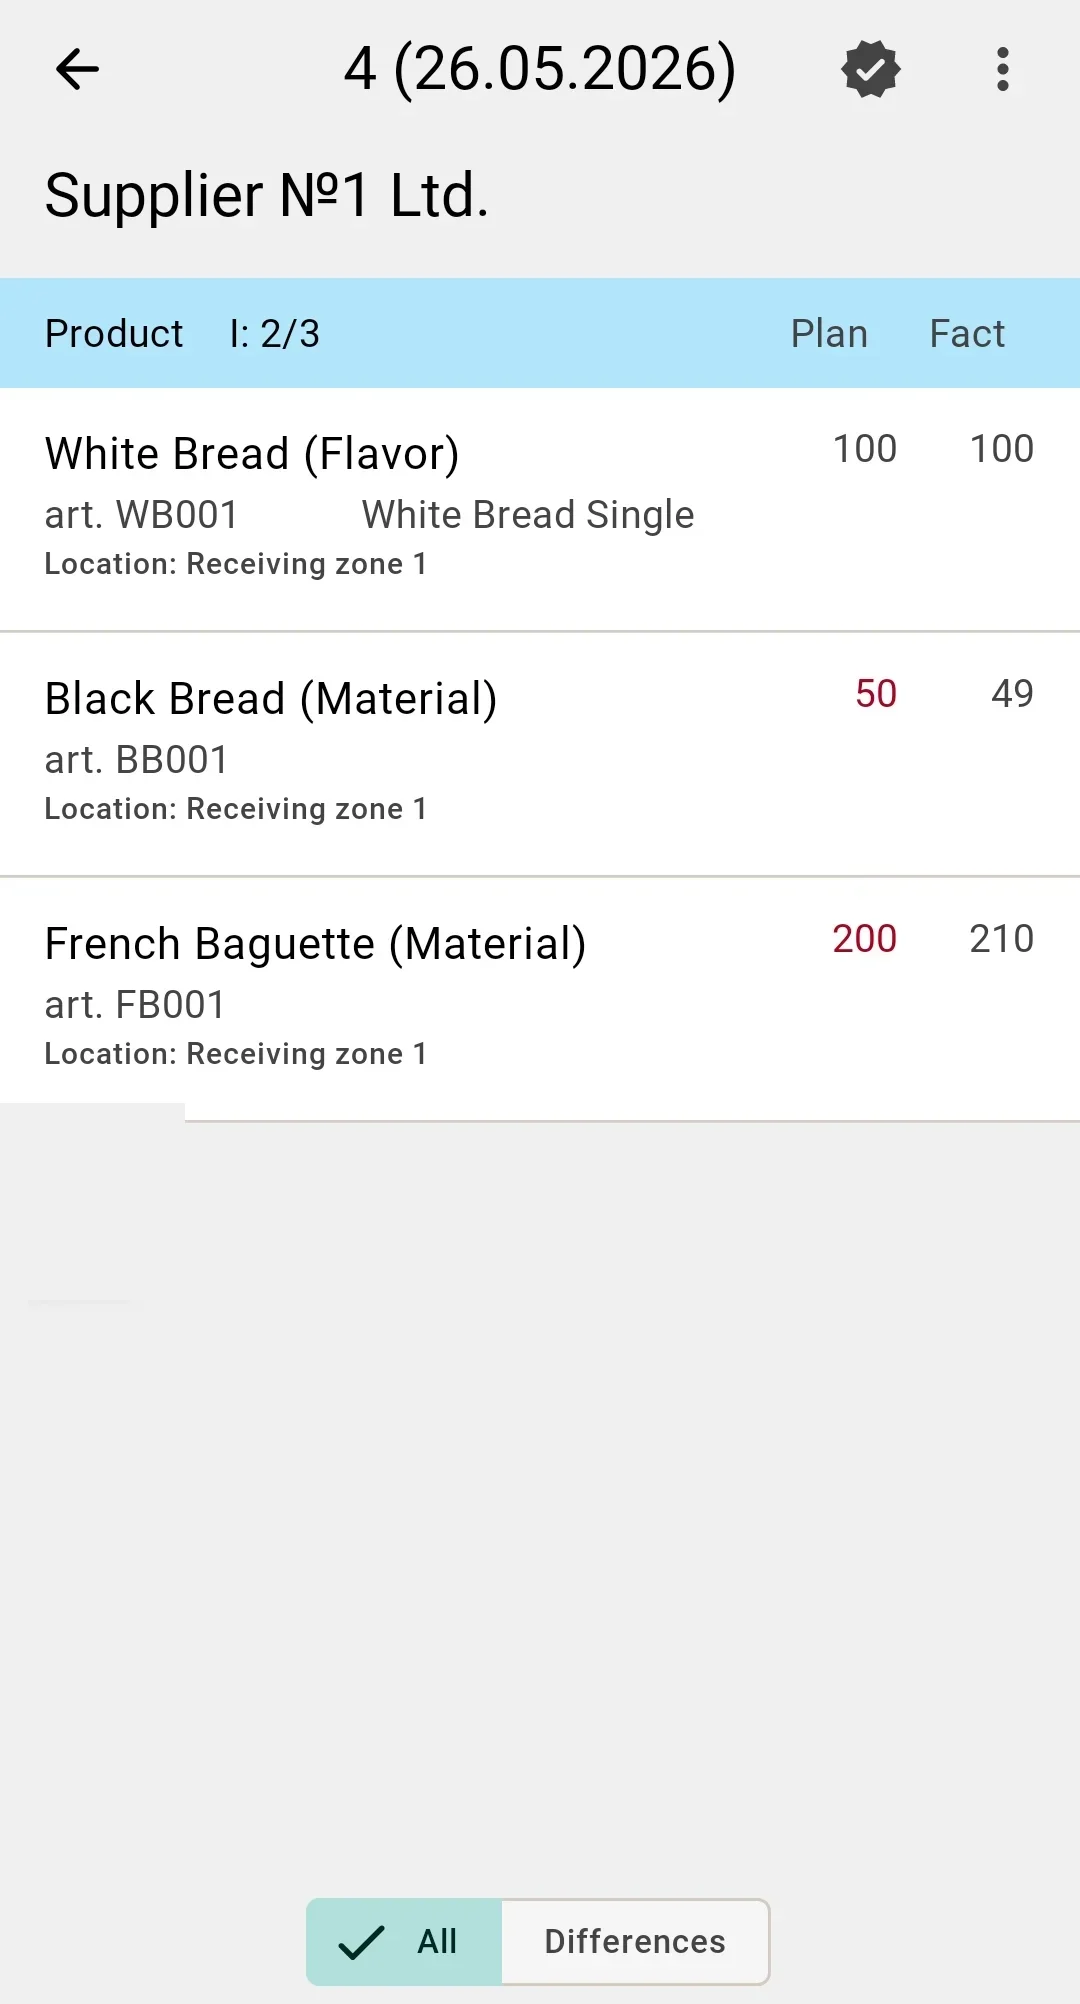
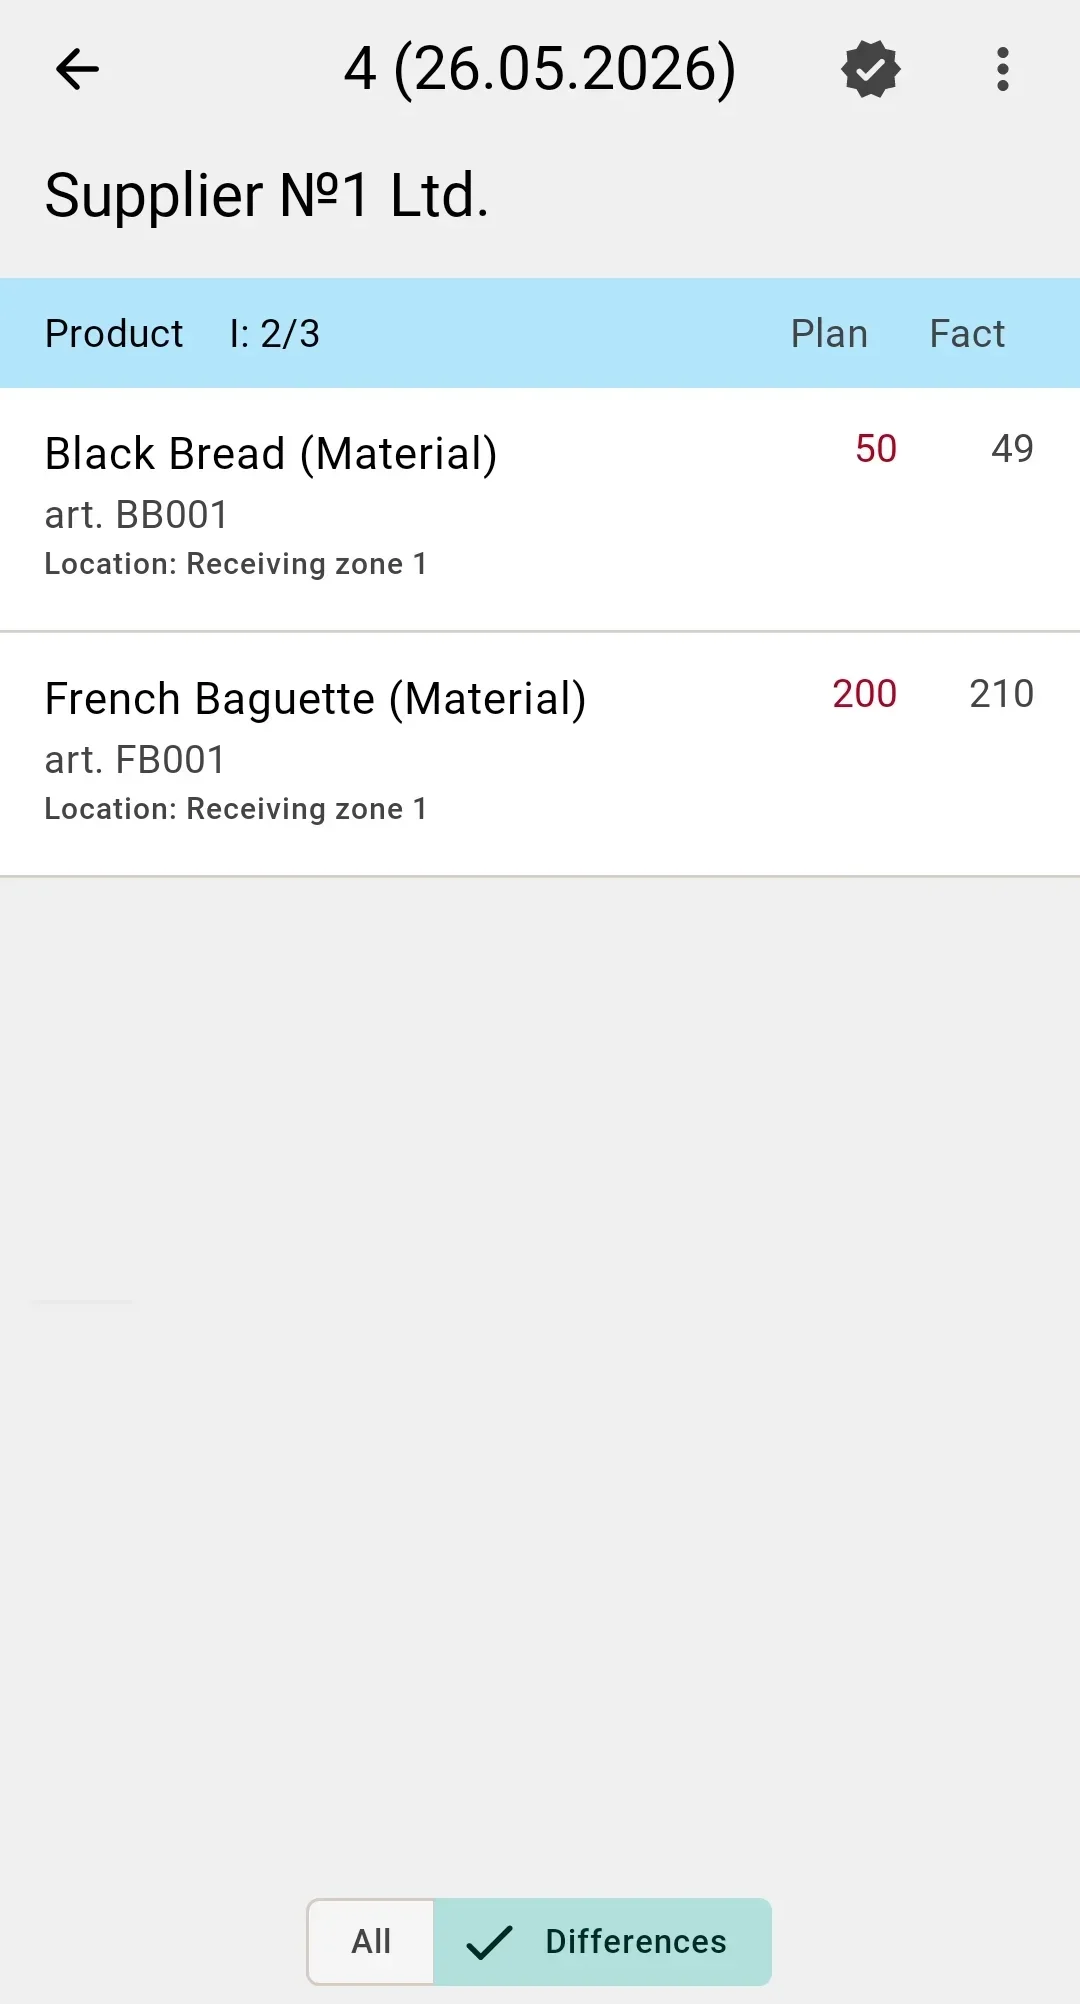
When unreceived lines remain in the document, the system first shows a warning dialog: confirming the completion will reduce the accounted receipt. The operator can go back and scan those lines or confirm as is. No separate shortage records are created — discrepancies are worked out in the client app.
After closure, downstream work — quality control (when enabled for the product category), discrepancy resolution, handoff to putaway — happens off the PDT. The PDT operator hands the document on and can pick up the next one.
What happens off the PDT (after your steps)
Steps performed after the PDT operator has recorded facts and closed the document: